
Back to Top
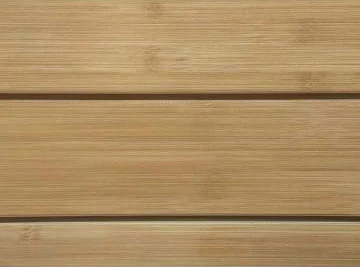
10 Steps to Follow When Installing a Pegboard Wall

A pegboard wall is a sure way to keep your workspace clean, safe, and well organized. Not only does a pegboard wall ensure organization, it also utilizes vertical space. This is a convenient storage technique since pegboards are pre-punched on 1x1 grids, which can be shifted and reconfigured to satisfy needs that might come up later. Follow these installation steps and your endeavor will end in success.

Step 1
Make sure you have enough available space for the fitting of the board. If you have a 90’s model garage then you probably have bare stud walls. These evolved into drywall after the fire code was put into place. You will, therefore, need furring strips to make any installation on the drywall.
Step 2
Take a measurement of your stud distance and have a strong horizontal support put in place. If you have a work table, then you want the lower edge of the board at that height. To support the lower and upper edge of the pegboard, install a horizontal blocking between the studs.
Step 3
If you are working with the new age dry walls, have 2X1 wooden furring strips to put on the perimeter walls and also place them vertically on every stud.
Step 4
This step involves the installation of the furring strips. You go about this by using a stud finder to mark the exact locations of preexisting studs. Then install furring strips vertically at each stud while also installing the studs horizontally across the top and bottom edges using 3-inch wood screws. Keep at it until you develop a nice grid layout.
Step 5
This involves making provisions for electrical outlets by cutting holes. A jigsaw will come in handy in cutting the holes for the outlets as well as the switches. The cuts should be just right so that the trim plate can cover the opening. As a test, hold the pegboard up the wall to ensure it fits and make any adjustments if need be.
Step 6
Make use of a circular or table saw to cut the pegboard to the required size.
Step 7
Once the pegboard has been cut to size, mount it to the wall studs or furring strips with the use of lathe screws. Wood screws will also work well on dry walls, though lathe screws are preferred since the large washer in the screws will help prevent tears.
Step 8
Install a rail system to carry heavy items. A pegboard is great but it is not sufficient in areas of the wall where you want to hold heavy items. Get a rail system that lines up with your pegboard, then use two wood screws at each stud to mount it.
Step 9
A white fresh coat of gloss enamel will help keep the board not only clean and attractive but also easier to clean in the future.
Step 10
Accessorize the structure using pegboard accessories in order to start organizing your boa
October 9, 2018
|
View: 650
|
Categories: Slatwall & Wall Panels, Slatwall Accessories, Wall Standards, Shelves & Systems
|
By: Web
About the Author

What is the Difference Between a Sale and a Clearance?
July 24, 2023
Organizing Your Store with the help of Hangers
January 7, 2019
10 Ways To Use Pantone's "Greenery" In Your Store
December 19, 2016
4 Pointers to Help Design the Right Label
September 13, 2018
How much weight can slatwall panels hold before getting breakout?
January 29, 2018
7 Benefits of Buying Gift Boxes With Lids in Bulk
March 20, 2024

7 Things to Consider When Buying Store Supply
March 20, 2024
All About Acrylic Risers
March 20, 2024
Versatile Elegance: Transforming Stores with Slatwall Panels
March 20, 2024

Validate your login